
Git-Fu Level 2: Black Belt
This is the last part of a three part series on git. For the initial post see here.
In the first “white belt”, I gave quick intro into git. In the second “red belt”, I have shown how to get some serious work done with git using branches and remotes. I have also shown a way to easily obtain useful logs on the command line (CLI).
For the last “black belt”, I will show more advanced techniques that mostly resolve around the rewiring of the branches and thus, the rewriting of the git history. Then — as they say — history is written by the winners!
Rebasing
While git is pretty clever in figuring out how the change sets from different branches need to be merged during a three-way merge, it has no notion about the semantics of your code. In the example below on the left hand side, the tip of master and the tip of the feature/a branch could both be correct but when you merge them, you could end up with faulty state. E.g. if there was a quick fix on master to solve a problem and on feature/a the problem was solved as well but in another place, you would end up with potentially wrong code again.
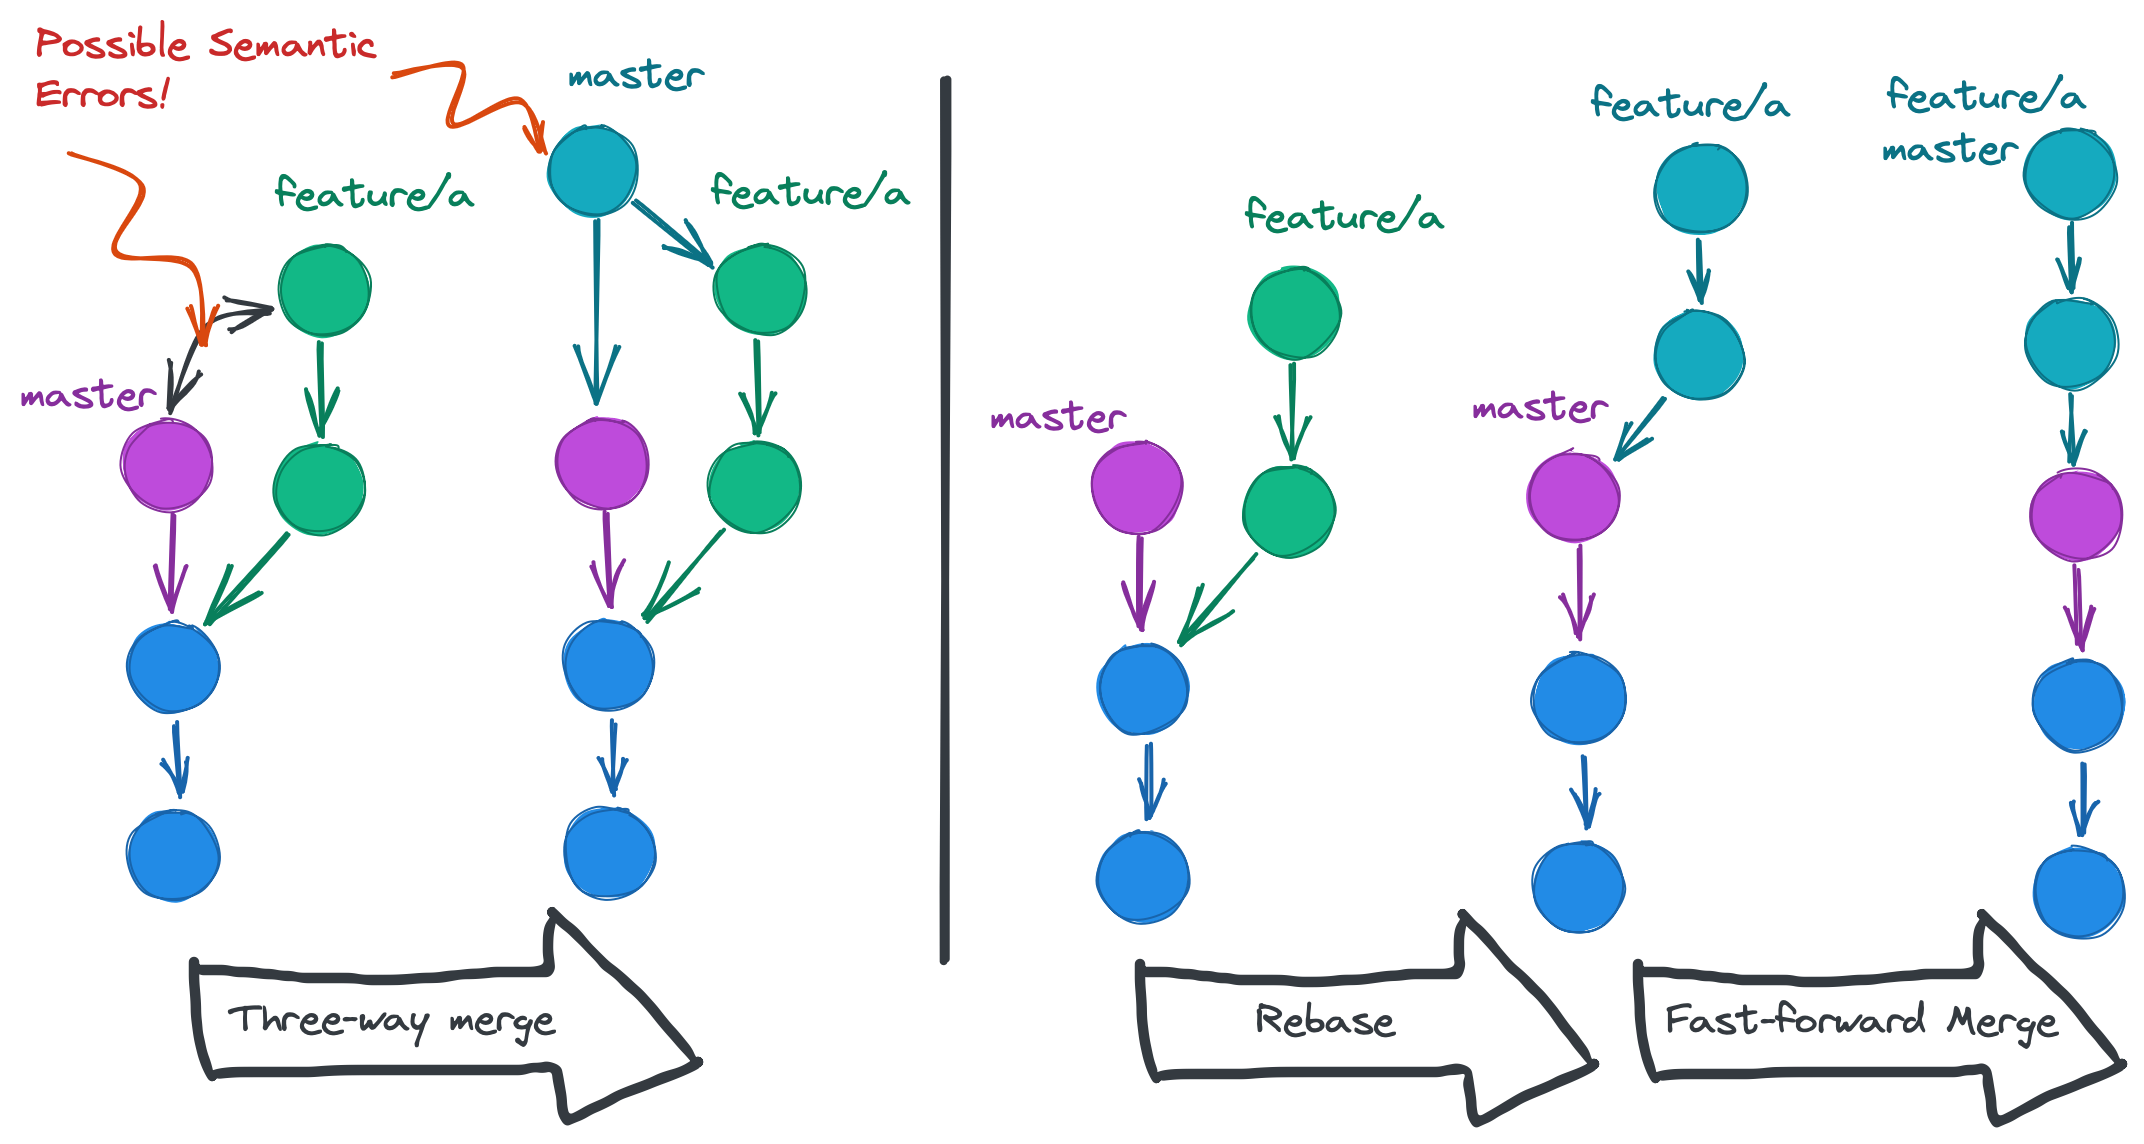
This, is where rebasing comes into play. If you work on a feature branch and in the mean-time something has been pushed to master, you can rebase your branch onto the new tip of master. Then, run your tests and verify that your work is still correct. If you now (fast-forward) merge into master, you are guaranteed to have a correct state again as it is basically the same one.
Another added benefit is that you obtain a linear history. This makes it much easier when trying to figure out which commit introduced a bug.
The typical procedure to rebase is as follows:
- make sure we are on feature/a
git checkout feature/a - get the latest data from the common remote
git fetch origin - do the rebase
git rebase origin/master - Fix any conflicts and then rebase
git push -f origin feature/a - now merge it on your hosted CVS solution or locally
It might seem dangerous for some people to rewrite the git history. But this is not the case as long as the rules are followed. And the rules are simply: don’t rewrite the history of public branches. By public branches I mean branches like master or specific release branches, where other people would assume that they don’t change.
Squashing
When you work on a new feature (branch), you might want to commit often and repeatedly to grasp all steps in case you want to return to an intermediate step. However, as you keep creating small commits, your git history fills up with a lot of “fixed typo”-like commits that are not really meaningful in the long run. Here, squashing comes into play. With squashing you can combine several commits together e.g. to create one big logical commit that then can be merged into the master branch.
The procedure to squash is a bit interactive and scary at first but after the first few times, it's a breeze.
Assume, you have three commits you want to squash together (newest at the top):
* Fix typo
* Add tests
* First draft
Now, use the command git rebase -i HEAD~3 (it's 3 because we have three commits to squash) and then we are dropped into vim (or any other editor) with a list of commits that looks like this:
pick   Fix typo
pick   Add Tests
pick   First draft
change the pick in the last two lines to squash (or s) so that it looks like
pick   Fix typo
squash Add Tests
squash First draft
Save and then write a new commit message (e.g. Add feature a).
You are now left with a single commit.
* Add feature aResetting
Sometimes, the git history can become quite messy. This might be due to some long running branches that did not get merged into the main branch and which create some complex dependencies. Or somebody who is new to git, might have done some weird merges while working on a feature. Whatever the reason is, the git history quickly looks like the graph below on the left side (believe me, I have seen this more than once!).

While one might be tempted to simply merge this mess into master and continue, it makes the git history very hard to reason about. In this case one can use a soft reset. With the example from above, the steps would be
git checkout feature/a
git branch -m a_backup
git reset —soft origin/master
git checkout -b feature/a
git commit
After those steps you should end up with the situation on the right. Of course, all the other branches (green and yellow) are still around but that won’t be your problem anymore.
Stashing
Sometimes, you might have just started working on something but you must suddenly work on an urgent bug fix. You then might not want to first create a commit and switch but yet you want to somewhat save the work. Here, stashing can help you.
You can stash your current changes as a work in progress (WIP) “commit” that gets saved on the stash stack. Once you are done with your urgent changes, switch back to your branch and pop the your saved WIP from the stash stack. You will see immediately all the changes you had done, i.e. you will be in the same “dirty” state as before.
The procedure looks like this:
# on feature/a branch
git stash
git checkout master
# work on master and commit (and release etc.)
git checkout feature/a
git stash pop
You can use git stash list to se a list of your saved WIPs.
Conclusion
Once you know all the techniques listed above you have truly mastered git. And you will have to fix all the git issues in your team. With great powers come great responsibilities!